
Making One Dated Bathroom into Two Modern Bathrooms
We currently live in a lovely little home that we absolutely adore! (And it's for sale. Are you in the market to buy the cutest house on the street?!) However, the one thing that doesn't work the best for us, is having one bathroom. With a toddler nearing the potty training stage (YAY!), plus two adults who prefer to pee in private, one bathroom isn't enough.
So, imagine our slight disappointment when the house we fell in love with only had one full bathroom. After checking out the house for the second time, we realized that the original laundry room and full bath had been combined into one awful laundry/bathroom.
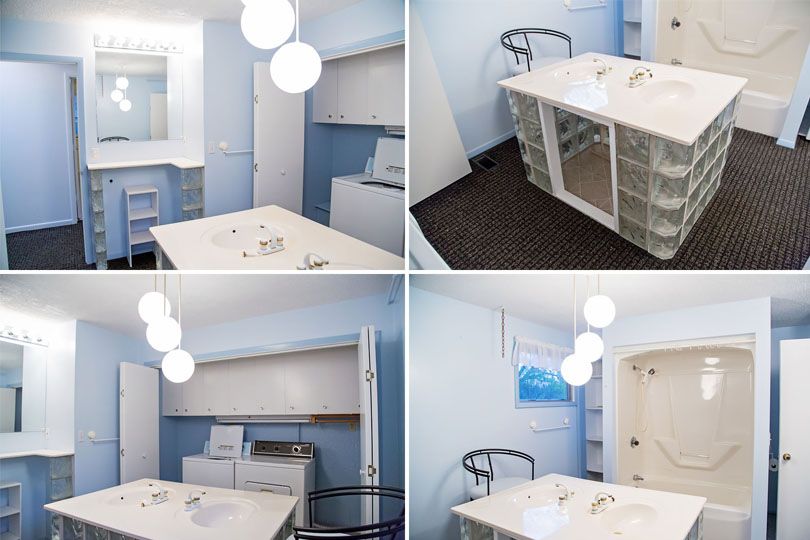
Does anyone remember this sink island? Yes, indeed, the former owners took it upon themselves in the 90's to remodel this bathroom as a DIY project. They did a great job matching the original globe lights, but that's about it.
 Sadly, we found the original bubble tile PAINTED OVER (ooh, the horror!), and we know the cabinets over the laundry area were original, but that's about all that was left. They even covered up an original laundry room door.... This awful remodel together with the lavender paint, acrylic tub and seashell accessories, and you've got a 1990's mess. Which we promptly ripped out with our friends Mark & Dee.
And then we said hello to the largest project (and possibly the most expensive) in the house....two new bathrooms.
Having a hallway bath that worked for guests and kids was important to us. And since it's the larger of the two bathrooms and primarily for Eames, it is where we put the tub. A freestanding tub wouldn't fit in the master bathroom with the walk-in shower we knew we'd use more, so we went with a 66" tub to accommodate me (who happens to be 64" tall). We also knew having a cast iron tub was important, as they literally last a lifetime with good care, and reglazing as necessary.
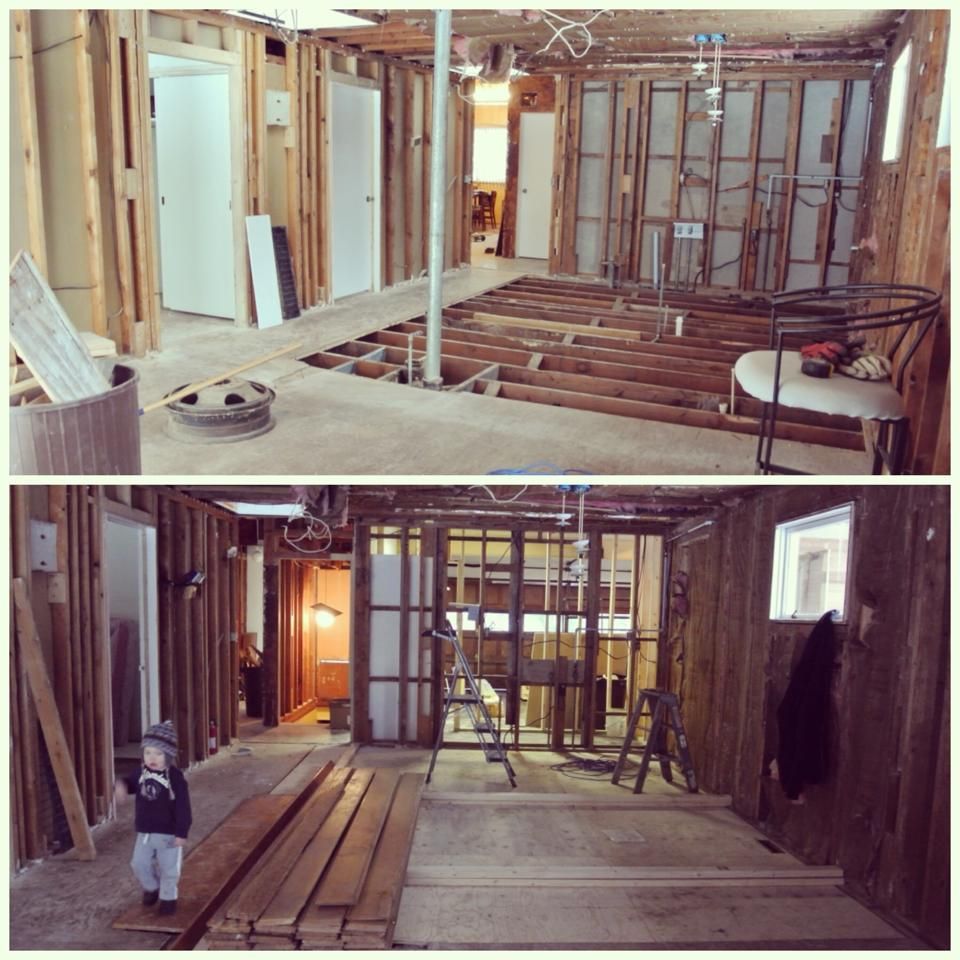
Above are the images of the "in process stages". The image on the left is from the hallway. On the left, you can see the plumbing for the 6' double vanity. It will be quite narrow at 16" because I didn't want it to take up too much space, and I did not want it to go in from of the glass block window. There will also be a floor-to-ceiling linen closet on your immediate left.
This was the former laundry room and when we started taking down drywall, we found an old exterior doorway. Since this room didn't have a window, we decided to make it into a large, glass block window. This solved the problem on the exterior, since our brick wraps around the entire house, and on the outside, you can totally tell this was a door. Now it looks like this glass block window has always been there (and mimics the one in the garage - we even found a pretty close match to the original 1950's block used in there!).
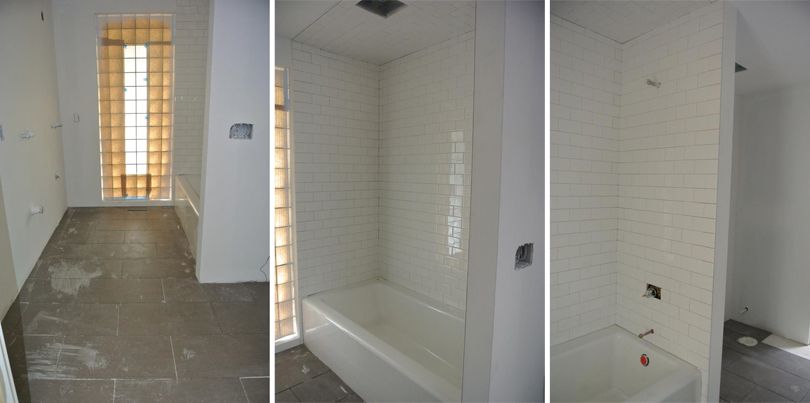
The second image is of our new tub and subway tile surround. The original plan was to use hexagon tile in here, however, the tile guy said it would look a little busy in the corners will all the cuts they would have to make. I took his advice and decided on glossy white subway tile instead. We also opted to tile the ceiling in the tub - makes it easier to clean and looks quite seamless.
The third image shows the little toilet nook to the left of door from the hallway. The tile floor in here is a dark gray and is 12x24. It actually looks a lot like our wood floors, but is a traditional ceramic tile. We love how it looks so far!
Thankfully, having a day spa as a bathroom was not important to us (although, if we had more room, I would have added a freestanding tub for sure...). What was important to us was enough room to both be brushing out teeth at the same time (since our current bathroom lacks this...) This room is functional, compact and will be quite lovely when it's done.
We knew we wanted a double shower, and we also didn't want to construct any extra walls in here. The easy answer was to put the shower at the back of the room. It's not a standard size, just whatever size the room happened to be, which was determined by the vanity and how much room we needed for the toilet. I believe this room is 72" wide.
The first image on the left is the photo from our bedroom walk-thru closet. Our double vanity/mirror/lights will go here and will be an exact duplicate of the one in Eames' bathroom - same faucets, same lights, same sinks. The second image is of the subway tiled double shower, and the third image is when they finished the floor and the threshold.
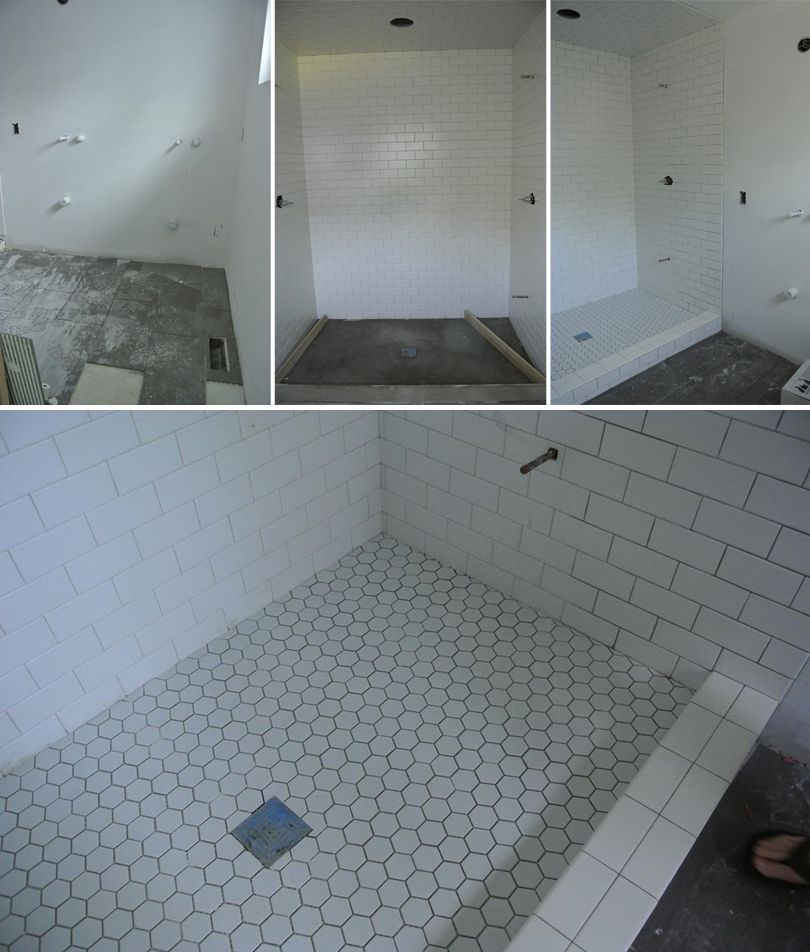
Since we couldn't use the hexagon in Eames' bathroom, we decided to put it on the floor in our shower. We originally planned to use the same tile that is on the actual floor, but the tile guy warned us it was too large and he'd have to make so many cuts to have it drain properly. We listened to him and ended up with an adorable floor in here - it's my favorite! We also mixed it up a teensy bit and put matte tiles (instead of glossy like in the other bathroom) in here. I'm excited to start brushing my teeth in here!
As for paint colors, we haven't quite decided, although I'm still pretty sure it will look a lot like this inspiration board I put together in January! A light aqua color keeps catching my eye, and we used Behr's Valley Mist in our current house and I pretty much love it, so am thinking it may be exactly the same. 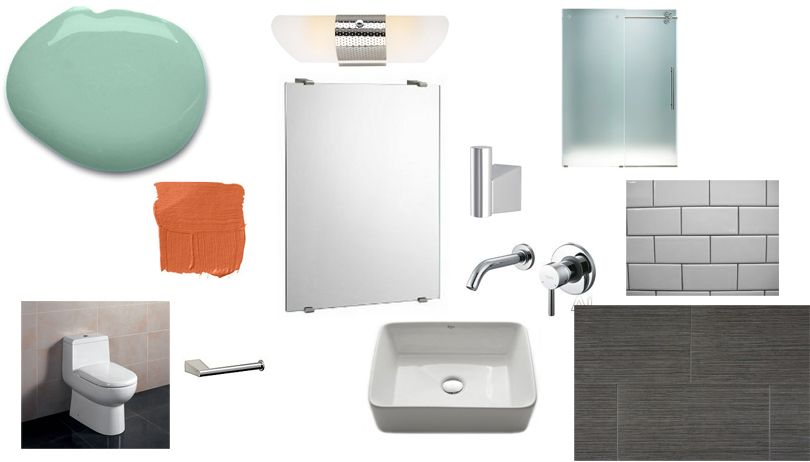
There ya have it - two simple bathrooms in progress! Above is the actual sink, faucet, light, toilet, tiles and possibly even paint colors. Will keep you posted as things progress!

0 thoughts:
Post a Comment